neovim入门指南(二):常用插件
常用插件配置
经过前面章节的介绍,当前的 neovim 已经可以开始基本的使用了。下面会推荐一下常见的插件,让我们快速的开始。
📂 nvim-tree
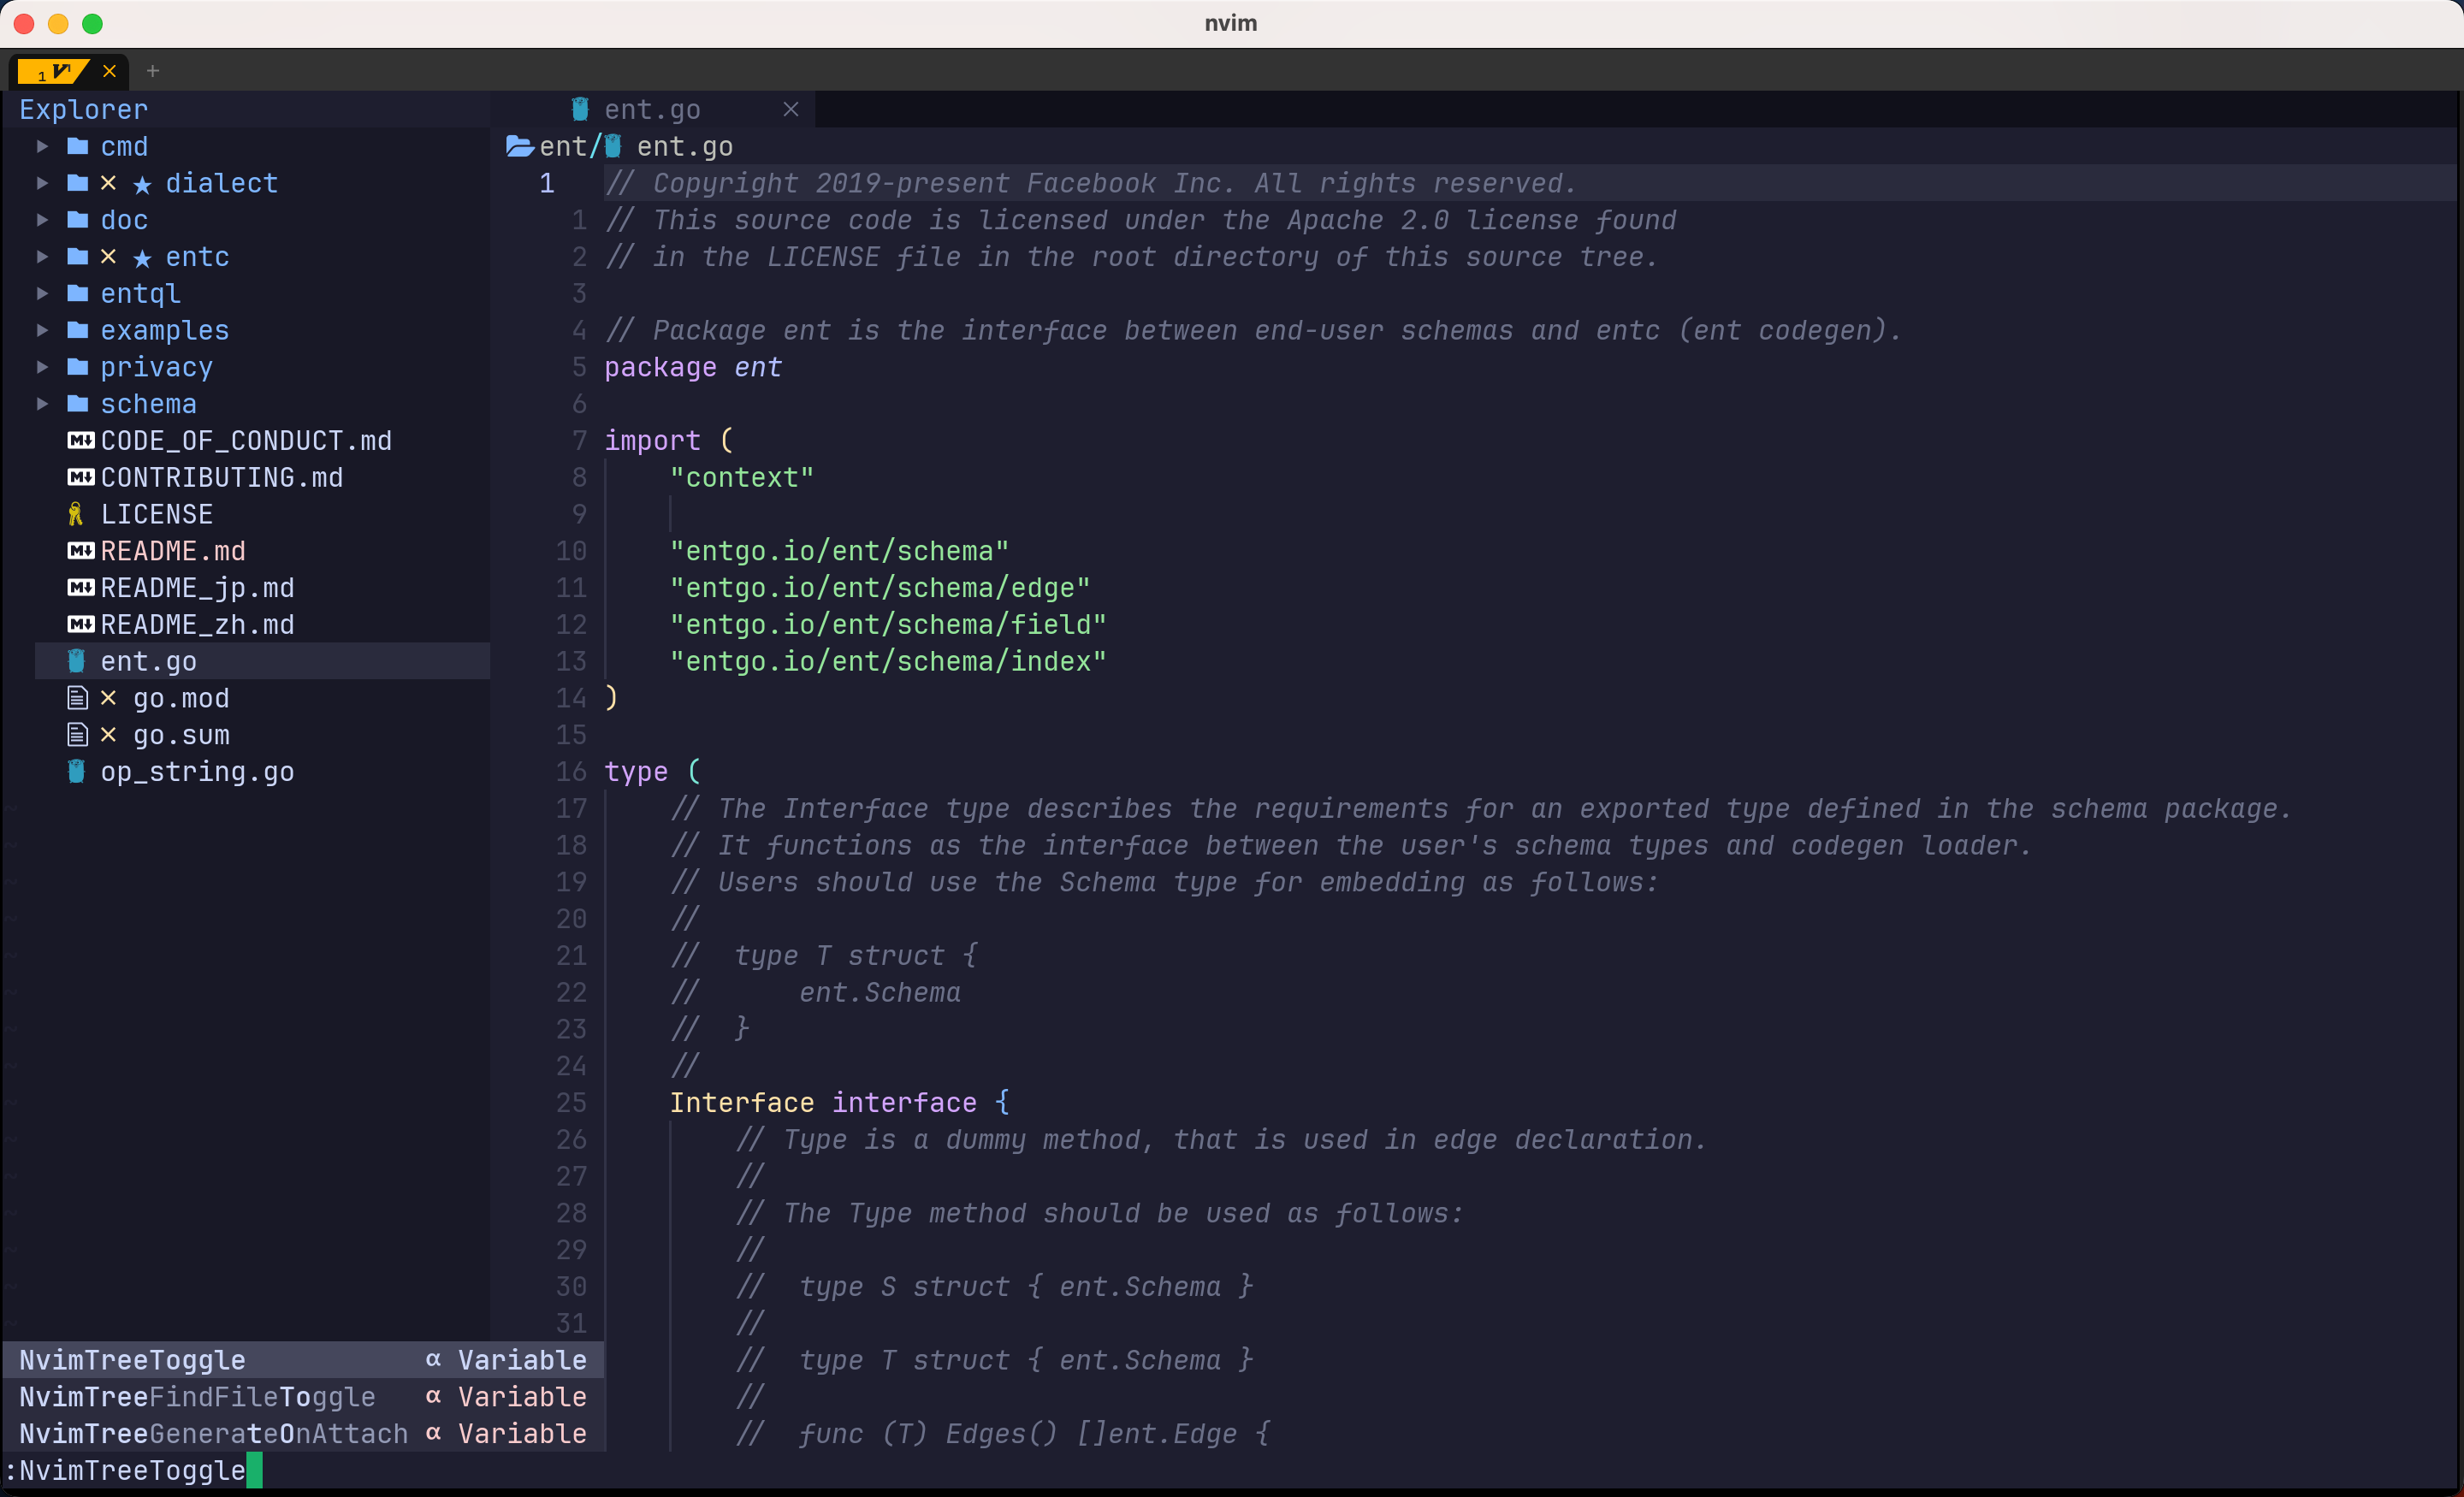
nvim tree 是一个文件浏览器,可以实现侧栏快速选择文件。
当前 neovim 的插件安装都很简单,根据我们之前所了解的方式,先在 Github 上找到相关仓库:https://github.com/nvim-tree/nvim-tree.lua,然后安装。具体如何安装,其实在项目的 README 中会有详细说明。
这里需要安装两个包,第一个就是 nvim-tree,而第二个是一个可选包,主要是用来显示图标的。在 plugins.lua 中新增配置。
-- plugins.lua
require("lazy").setup(
	-- 省略其他配置
    { "kyazdani42/nvim-tree.lua", event = "VimEnter", dependencies = "nvim-tree/nvim-web-devicons" },
)
之后在 lua 目录中新建一个 plugins-config 目录,目录中新建 nvim-tree.lua 文件。之后就可以开始我们的配置了。大部分配置其实可以参考官方的 Wiki。
这里我们通过 pcall 函数来加载相关插件。
为什么要使用 pcall ? 当插件没有安装或者出现其他问题的时候,nvim 在启动时,无法加载相关查询,就会抛出异常,通过 pcall 就可以进行相关捕获,从而不影响 nvim 的使用。
local status, nvim_tree = pcall(require, "nvim-tree")
if not status then
	vim.notify("没有找到 nvim-tree")
	return
end
这样在加载不到 nvim-tree 的时候,就会通过 vim.notify 报出来。
剩下的就是配置我们的 nvim-tree 了。
nvim_tree.setup({
  sort_by = "case_sensitive",
	-- 是否显示 git 状态
	git = {
		enable = true,
	},
	-- 过滤文件
	filters = {
		dotfiles = true, -- 过滤 dotfile
		custom = { "node_modules" }, -- 其他过滤目录
	},
  view = {
	-- 文件浏览器展示位置,左侧:left, 右侧:right
	side = "left",
	-- 行号是否显示
	number = false,
	relativenumber = false,
	signcolumn = "yes" -- 显示图标
	width = 30,
  },
  renderer = {
    group_empty = true,
  },
})
最后在最外层的 init.lua 中添加配置。
require("plugins-config.nvim-tree")重新退出后打开,通过命令 :NvimTreeToggle 或者 A-m,可以打开或关闭侧边栏。
如果需要修改快捷键,可以在 keybindings.lua 中新增相关快捷键,之后在 nvim-tree 中引用。
-- keybindings.lua
local pluginKeybinding = {}

pluginKeyBinding.nvim-tree = {
	{ key = "<F5>", action = "refresh" },
}
在 nvim-tree 中,设置相关快捷键。首先要在 nvim-tree.lua 中引入这个变量,并在 setup 中设置相关值。
local keymap = require('keybindings').nvim-tree

nvim_tree.setup({
	-- ...
	view = {
		mappings = {
			custom_only = false,
			list = keymap,
		}
	}
  -- ...
})
📨 bufferline
bufferline 是一个对 buffer 进行管理的插件,可以像现代IDE或者编辑器一样打开多个 Tab,而且可以快速进行切换。安装部分不多赘述,在 README 中上有详细描述。bufferline 地址:https://github.com/akinsho/bufferline.nvim
在 plugins-configs 目录下新建 bufferline.lua 文件,进行配置,仍旧是采用 pcall 进行加载,之后就可以进行配置。
-- bufferline.lua
local status, bufferline = pcall(require, "bufferline")
if not status then
vim.notify("没有找到 bufferline")
return
end
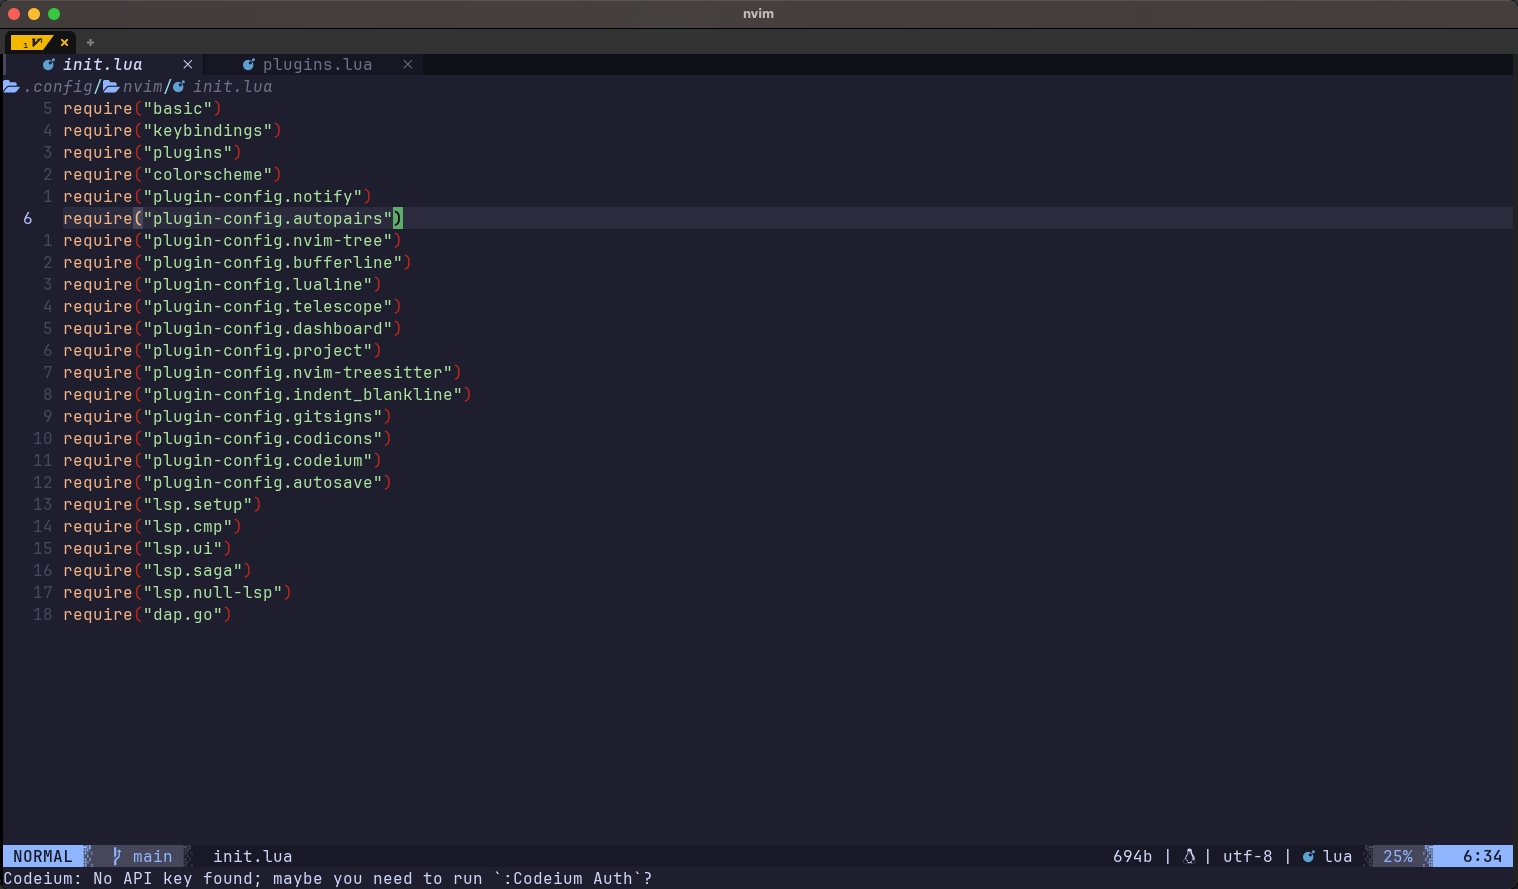
bufferline.setup({})再次打开 neovim,同时打开多个文件,就会发现在上方出现了新的 tab。
需要进行一些设置,例如当前打开的前面安装的 nvim-tree , tab 会显示在 nvim-tree 上面,这显然是不符合预期的。通过命令 :h bufferline-configuration 来查看插件支持的配置。
通过帮助文档可以看到 offset 配置和 nvim tree 有关系,这样我们就可以通过相关的配置完成配置。
-- bufferline.lua
bufferline.setup({
	options = {
		offsets = {
			{
				filetype = "NvimTree",
				text = "File Explorer",
				text_align = "left",
				separator = true,
			},
		},
	},
})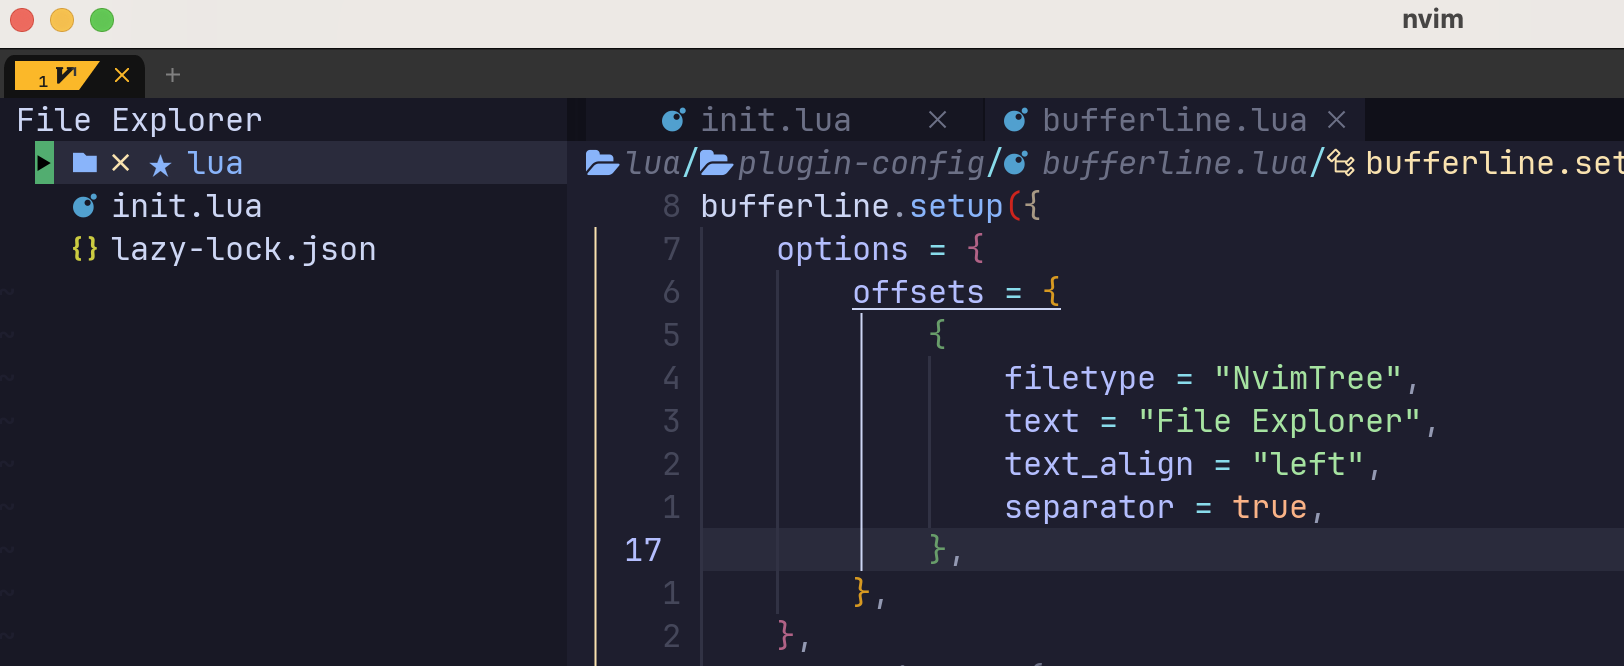
通过这样的设置就可以发现,当打开 nvim tree 的时候,tab 栏会自动向右偏移,而不会出现在 nvim tree 上方。 其他的设置可以通过上述的方式,通过帮助来查看。这里贴出我的配置。
-- bufferline.lua
options = {
close_command = "bdelete! %d", -- 点击关闭按钮关闭
right_mouse_command = "bdelete! %d", -- 右键点击关闭
indicator = {
icon = '▎', -- 分割线
style = 'underline',
},
buffer_close_icon = '',
modified_icon = '●',
close_icon = '',
offsets = {
{
filetype = "NvimTree",
text = "File Explorer" ,
text_align = "left",
separator = true,
}
},
}这里使用了 bdelete 相关命令,这个是 moll/vim-bbye 这个插件提供的,使用上面的配置需要安装该插件。
同时,可以在 keybinding.lua 中设置切换 tab 的快捷键。我这里设置为 Ctrl + h/l 来左右切换。
-- keybindings.lua
map("n", "<C-h>", ":BufferLineCyclePrev<CR>", opt)
map("n", "<C-l>", ":BufferLineCycleNext<CR>", opt)
✏️ lualine
lualine 插件可以提供类似的效果,在编辑器上提供一些信息提示,例如 Git 状态,文本编码等,下图是 Github 上的效果。

如何安装可以直接看 nvim-lualine/lualine.nvim 上介绍,不多赘述。同样在 plugins-configs 下建立相关的配置文件 lualine.lua,通过 pcall 方式引入,使用 lualine.setup({}) 引入插件,最后在 init.lua 中添加配置文件。每个插件的安装使用方式都基本相似,如果有不同情况,会另外说明,后续的插件安装将不在说明这些步骤。
在 lualine 中,显示区域被分成了 6 个部分,分被用 A,B,C,X,Y,Z 组成。
+-------------------------------------------------+
| A | B | C                             X | Y | Z |
+-------------------------------------------------+
上面的每个部分都可以进行定制。在仓库中有三种样例,可以直接在 example 中找到。
相关配置:
local status, lualine = pcall(require, "lualine")
if not status then
vim.notify("没有找到 lualine")
return
end
lualine.setup({
options = {
theme = "auto",
component_separators = { left = "|", right = "|" },
section_separators = { left = " ", right = "" },
},
extensions = { "nvim-tree", "toggleterm" },
sections = {
lualine_c = {
"filename",
},
lualine_x = {
"filesize",
{
"fileformat",
symbols = {
unix = '', -- e712
dos = '', -- e70f
mac = "", -- e711
},
},
"encoding",
"filetype",
},
},
})经过配置就可以看到这样的效果了。

最近(2024 年 03 月 02 日)我更新了一下 lualine 样式,相较于之前更加简洁。相关样式如下

相关配置
lualine.setup({
options = {
theme = "auto",
component_separators = { left = "", right = "" },
section_separators = { left = " ", right = "" },
},
extensions = { "nvim-tree", "toggleterm" },
sections = {
lualine_a = {
{
"mode",
icons_enabled = true,
},
},
lualine_b = {
{
"filetype",
colored = true,
icon_only = true,
},
"filename",
},
lualine_c = {
"branch",
"diff",
},
lualine_x = {},
lualine_y = {},
lualine_z = {
"progress",
},
},
})🔍 telescope
经过上面的配置,Neovim 的编辑界面已经逐渐“现代化”。Telescope 可以让我们的查找过程更加丝滑,主要可以用来做模糊查询。
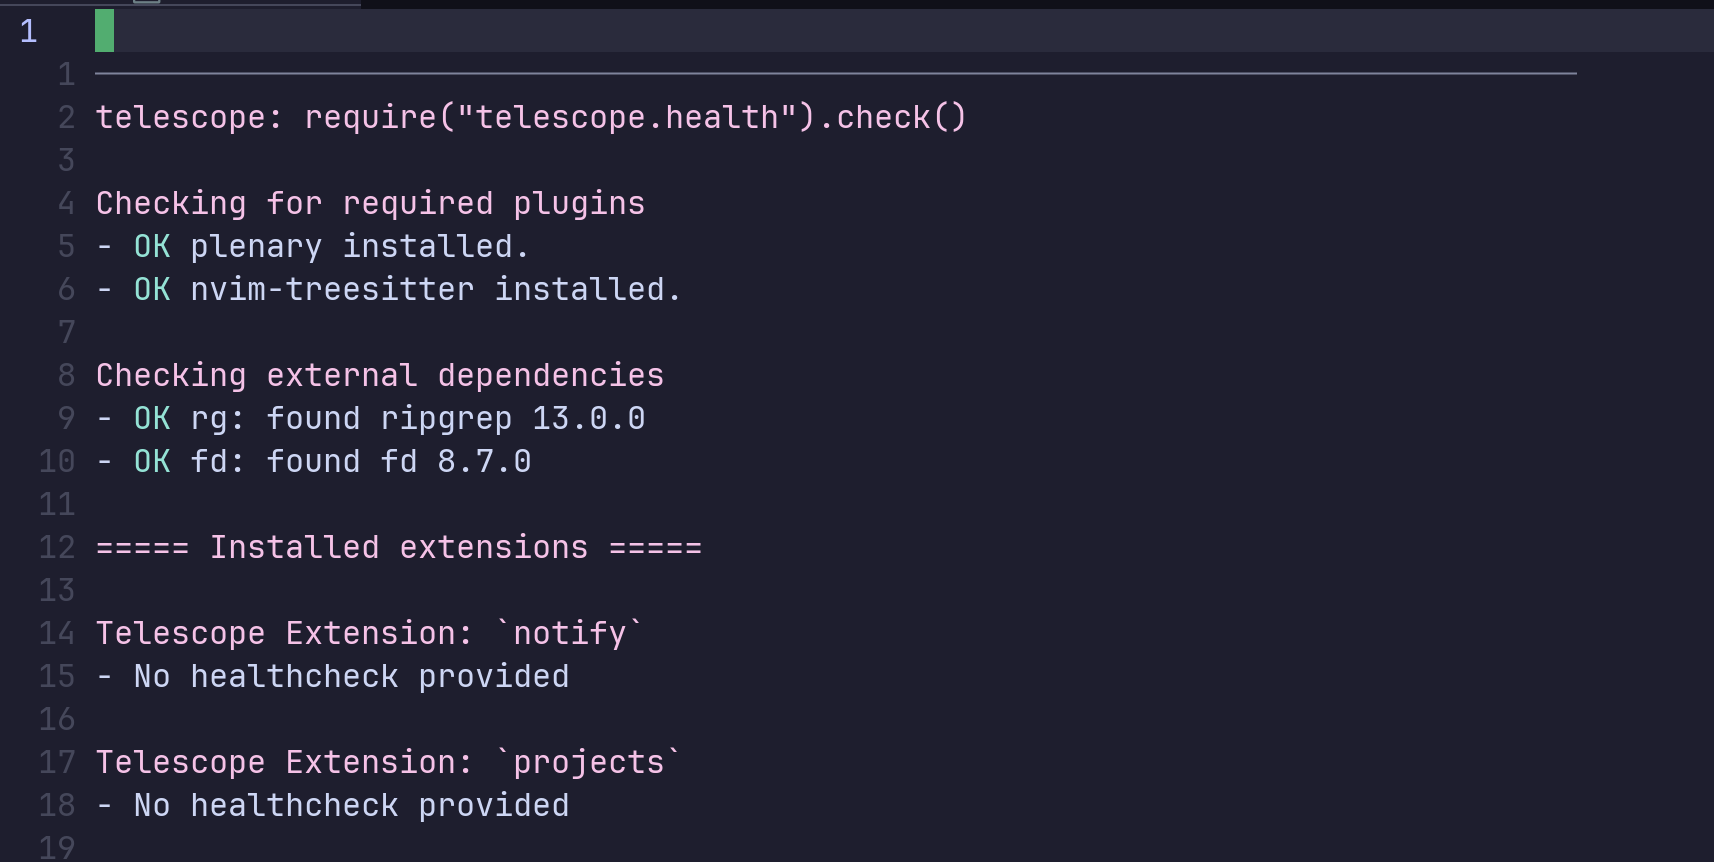
telescope 安装也比较简单,可以参考 github 上的 README 进行安装。但是往往安装后无法进行模糊查询。这里就需要我们的另外的配置了。其实在 README 中也写的很明白,安装完成后,需要运行 :checkhealth telescope 命令。
通过该命令,可以看到当前插件的状态,是否可用,如果是首次安装,会提示 ERROR 和 WARNING,如图所示:
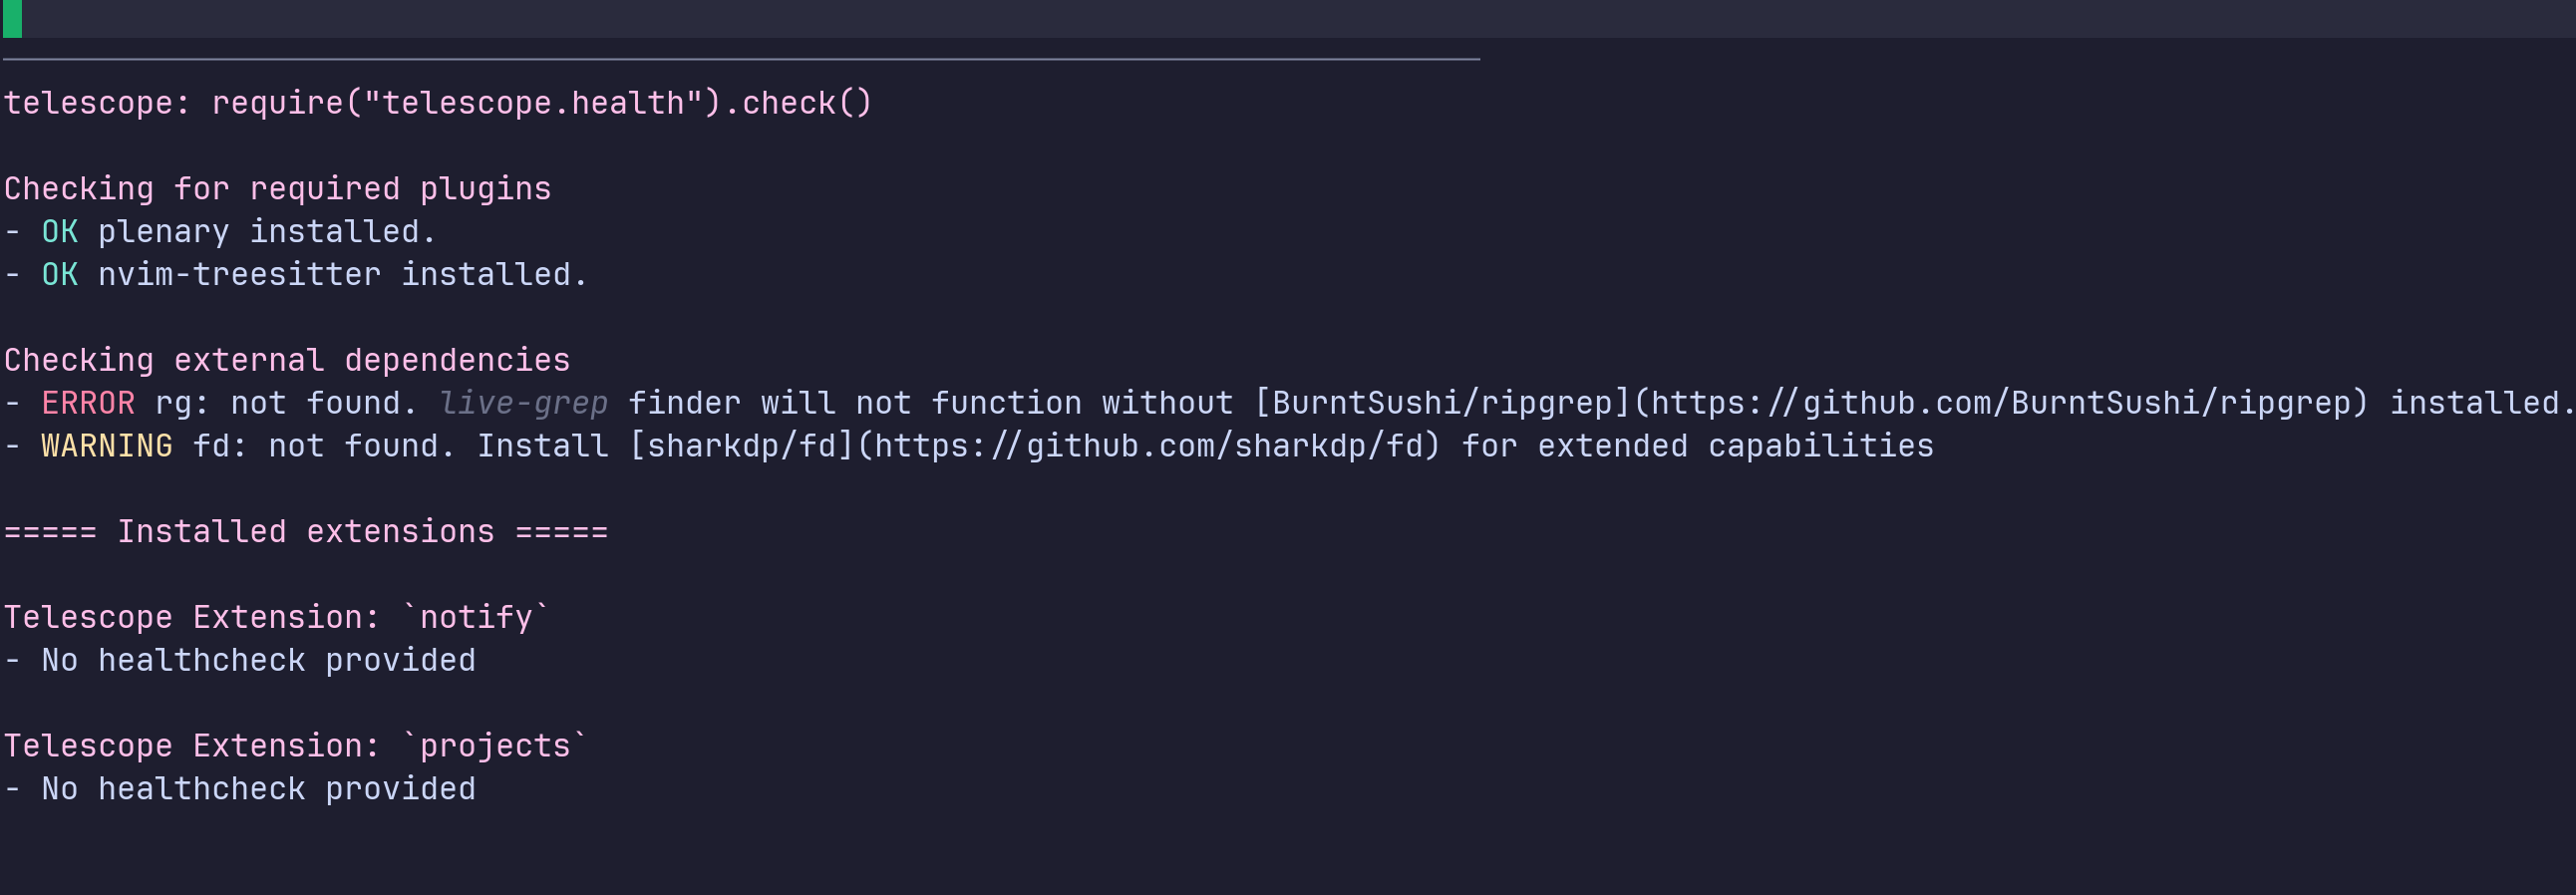
从提示可以看到缺少 rg 和 fd,同时在后面的说明中给出了相关的安装地址。这两个软件是进行模糊搜索的关键,可以通过以下两个地址进行安装,在 Github 的 README 中都明确的写出了两个软件在不同的系统上的安装方式。
如果你是用 mac,恰好已经安装 brew,那么只需要下面的两行命令即可完成安装。
brew install rg
brew install fd
安装完成后,重新 :checkhealth telescope,如果都是 OK,则证明安装正确,如下图所示:
安装完成后就可以通过命令使用 telescope,进行快捷的模糊查询。:Telescope find_file 为查找文件,Telescope live_grep 为全局查询。为了方便,可以在 keybindings.lua 配置中绑定为对应的快捷键。下面是我快捷键的对应绑定。
-- keybindings.lua
-- 查找文件
map("n", "<C-p>", ":Telescope find_files<CR>", opt)
-- 全局搜索
map("n", "<C-f>", ":Telescope live_grep<CR>", opt)
更多有趣的配置可以看 Github 仓库。
附录
Nerd 字体安装
在上面的很多配置中,很多图标是无法显示的,会导致文本中或者界面中显示有问题,常常会显示为一个⊠,这里就需要一个 nerd 字体进行支持。
Nerd 字体可以看做原始字体的一个补丁,这个补丁对原始字体新增了大量的图标。
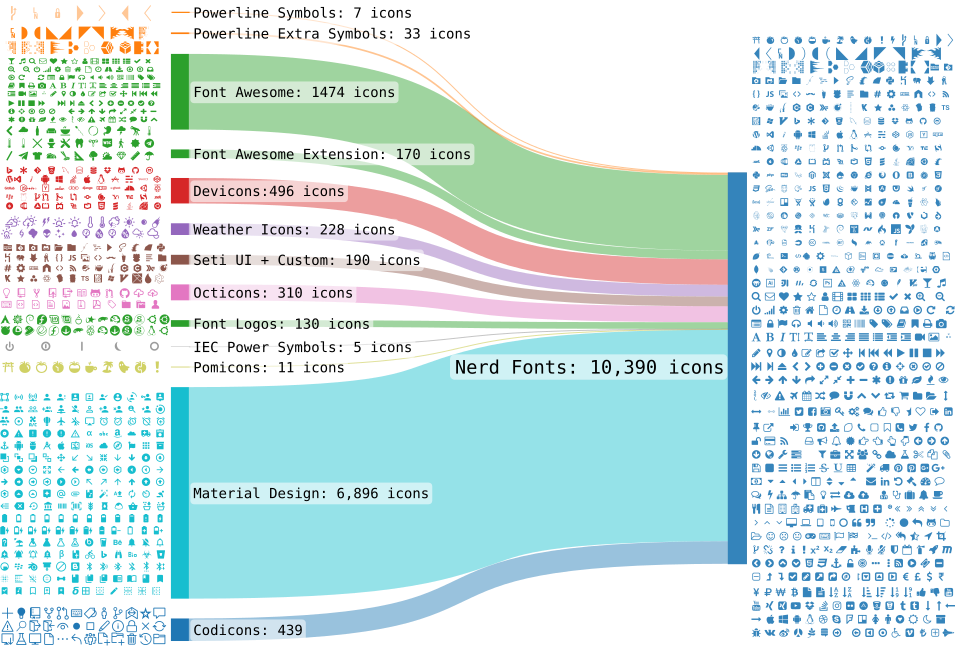
针对上面无法显示的图标,需要安装好相关的 Nerd 字体。相关字体可以在官方网站下载,一些知名的字体都会有 nerd 版本,例如:FiraMono、JetBrainsMono、UbuntuMono 等。大家可以依照自己的喜好进行下载安装。
字体配置
不同的终端模拟器有不同的配置方式,这里列出常见的配置方式。
iTerm2
iterm2 设置如下
Profiles -> Text 中,将 font 修改为 Nerd 字体即可。
WezTerm
WezTern 修改配置文件 ~/.config/wezterm/wezterm.lua。
local wezterm = require("wezterm")
local config = {}

config.font = wezterm.font_with_fallback({
	{ family = "JetBrainsMono Nerd Font Propo", weight = "Bold" },
	{ family = "苹方-简", weight = "Bold" },
	"Noto Color Emoji",
})
相关内容


如果你觉得这篇文章对你有所帮助,欢迎赞赏~
赞赏