Gin(六):文件上传
之前使用了数据库做了简单的增加和查询功能,今天再次使用数据库完成一些其他功能,比如说头像的上传和显示。
📷新增用户头像
当用户登录完成后,页面右上角会显示当前用户的用户 email 。下面我们做点击 email 进入用户详情页,并可以修改信息。
先完善后端接口。通过用户的 id 来获取用户的详细信息,同时我们写了一个错误页 error.tmpl,来进行错误信息的展示。
userHandler.go
func UserProfile(context *gin.Context) {
	id := context.Query("id")
	var user model.UserModel
	i, err := strconv.Atoi(id)
	u, e := user.QueryById(i)
	if e != nil || err != nil {
		context.HTML(http.StatusOK, "error.tmpl", gin.H{
			"error": e,
		})
	}
	context.HTML(http.StatusOK, "user_profile.tmpl", gin.H{
		"user": u,
	})
}
代码中获取前端传递的id,通过 strconv.Atoi() 将String 类型转化为 int 类型。user.QueryById() 方法是我们用来进行对id查询的方法。
在进行 QueryById 方法之前,我们要对 user 结构体和数据库进行一下简单的修改。
type UserModel struct {
	Id       int            `form:"id"`
	Email    string         `form:"email" binding:"email"`
	Password string         `form:"password" `
	Avatar   sql.NullString
}
我们新增一行 Avatar ,类型为 sql.NullString 。为什么是 sql.NullString ?因为我们数据库中该字段初始时为 null ,而 string 类型是不可以接收 null 类型的,所以我们只能采用 NullString 来对 null 字符串进行处理。
同时,要对数据库进行添加,新增一列 avatar 字段。
修改后数据库
create table user
(
	id int auto_increment
		primary key,
	email varchar(30) not null,
	password varchar(40) not null,
	avatar varchar(100) null
)
comment '用户表';
完成前期的修改工作,可以做剩下的事情。
🕵️获取用户信息
在 userModel.go 中获取用户信息,完成 QueryById 方法
func (user *UserModel) QueryById(id int) (UserModel, error) {
	u := UserModel{}
	row := initDB.Db.QueryRow("select * from user where id = ?;", id)
	e := row.Scan(&u.Id, &u.Email, &u.Password, &u.Avatar)
	if e != nil {
		log.Panicln(e)
	}
	return u, e
}
该方法基本和上一节的通过邮箱查询用户方法基本一致。
完成该方法后,就可以将我们的路由添加上。
userRouter.GET("/profile/", handler.UserProfile)此时就完成了后台的工作,剩下来就是对前端进行修改。
首先要重写划分一下前端的代码块。
template
|
|-error.tmpl
|-header.tmpl
|-index.tmpl
|-login.tmpl
|-nav.tmpl
|-user_profile.tmpl
我们将原来 index 中 head 标签部分的代码移动到 header 中,将 header 原有的代码移动到 nav.tmpl 中。
index.tmpl
{{template "header"}}
<header>
    {{template "nav" .}}
</header>
<main>

</main>
header.tmpl
{{ define "header" }}
    <!doctype html>
    <html lang="en">
    <head>
        <meta charset="UTF-8">
        <meta name="viewport"
              content="width=device-width, user-scalable=no, initial-scale=1.0, maximum-scale=1.0, minimum-scale=1.0">
        <meta http-equiv="X-UA-Compatible" content="ie=edge">
        <link rel="stylesheet" href="/statics/css/bootstrap.min.css">
        <link rel="stylesheet" href="/statics/css/bootstrap-grid.min.css">
        <link rel="stylesheet" href="/statics/css/bootstrap-reboot.min.css">
        <script src="/statics/js/jquery.min.js" rel="script"></script>
        <script src="/statics/js/Popper.js" rel="script"></script>
        <script rel="script" src="/statics/js/bootstrap.bundle.js"></script>
        <title>Gin Hello</title>
    </head>
{{end}}
在 nav.tmpl 中
{{ if .email }}
	<ul class="navbar-nav ">
		<li class="nav-item">
			<a class="nav-link" href="/user/profile?id={{.id}}">{{ .email }}</a>
		</li>
	</ul>
{{ else }}
	<ul class="navbar-nav ">
		<li class="nav-item">
			<a class="nav-link" data-toggle="modal" data-target="#login-modal">登录</a>
		</li>
		<li class="nav-item">
			<a class="nav-link" data-toggle="modal" data-target="#register-modal">注册</a>
		</li>
	</ul>
{{end}}
通过路径 /user/profile?id={{ .id }} 将 id 数据传递后台。
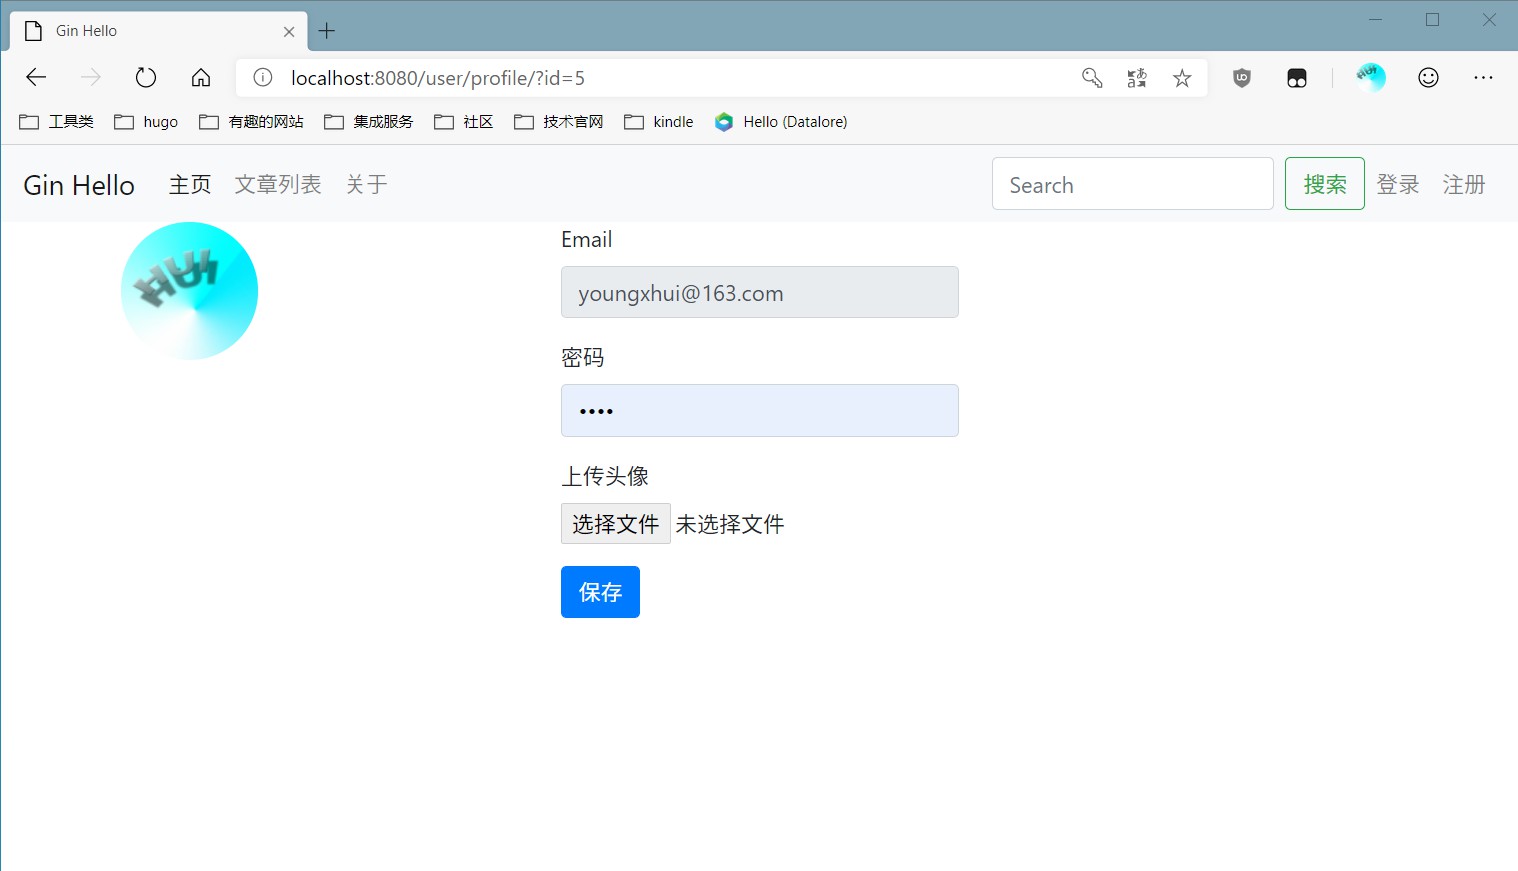
当数据获取成功后,会转跳到 user_profile.tmpl 中
user_profile.tmpl
{{template "header"}}
{{template "nav"}}
<div class="container">
    <div class="row">
        <div class="col-sm">

            <div>
                <img src="{{ .user.Avatar.String }}" alt="avatar" class="rounded-circle">
            </div>

        </div>
        <div class="col-sm">
            <form method="post" action="/user/update" enctype="multipart/form-data">
                <div class="form-group" hidden>
                    <label for="user-id">id</label>
                    <input type="text" id="user-id"
                           name="id"
                           value="{{ .user.Id }}">
                </div>
                <div class="form-group">
                    <label for="user-email">Email</label>
                    <input type="email" class="form-control" id="user-email" aria-describedby="emailHelp"
                           name="email"
                           readonly
                           placeholder="Enter email"
                           value="{{ .user.Email }}">
                </div>
                <div class="form-group">
                    <label for="user-password">密码</label>
                    <input type="password" class="form-control" id="user-password" placeholder="密码" name="password"
                           value="{{.user.Password}}">
                </div>
                <div class="form-group">
                    <label for="user-avatar">上传头像</label>
                    <input type="file" class="form-control-file" id="user-avatar" name="avatar-file">
                </div>
                <button type="submit" class="btn btn-primary">保存</button>
            </form>
        </div>
        <div class="col-sm"></div>
    </div>
</div>
该页面的 Email 不可编辑,密码可以修改,头像可以上传。
此时我们的页面就完成了。
🛫上传头像
完成了基本页面,就要进行头像上传了。
在 userHandler.go 添加 UpdateUserProfile 方法
func UpdateUserProfile(context *gin.Context) {
	var user model.UserModel
	if err := context.ShouldBind(&user); err != nil {
		context.HTML(http.StatusOK, "error.tmpl", gin.H{
			"error": err.Error(),
		})
		log.Panicln("绑定发生错误 ", err.Error())
	}
	file, e := context.FormFile("avatar-file")
	if e != nil {
		context.HTML(http.StatusOK, "error.tmpl", gin.H{
			"error": e,
		})
		log.Panicln("文件上传错误", e.Error())
	}
}
通过数据绑定来将 id email 和 密码进行绑定,然后通过 context.FormFile() 将文件数据进行获取。
文件数据可以获取,那么获取的文件应该进行保存。
先写一个工具类来获取我们的项目根路径。
新建一个 utils 文件夹, utils 中新建 pathUtils.go
package utils

import (
	"log"
	"os"
	"os/exec"
	"strings"
)

func RootPath() string {
	s, err := exec.LookPath(os.Args[0])
	if err != nil {
		log.Panicln("发生错误",err.Error())
	}
	i := strings.LastIndex(s, "\\")
	path := s[0 : i+1]
	return path
}
编写工具类,方便我们日后对它直接使用。
// 省略部分代码
path := utils.RootPath()
path = filepath.Join(path, "avatar")
e = os.MkdirAll(path, os.ModePerm)
if e != nil {
	context.HTML(http.StatusOK, "error.tmpl", gin.H{
		"error": e,
	})
	log.Panicln("无法创建文件夹", e.Error())
}
fileName := strconv.FormatInt(time.Now().Unix(), 10) + file.Filename
e = context.SaveUploadedFile(file, path+fileName)
if e != nil {
	context.HTML(http.StatusOK, "error.tmpl", gin.H{
		"error": e,
	})
	log.Panicln("无法保存文件", e.Error())
}
通过获取当前时间来确保图片的唯一性,保障上传的图片不会因为重名而覆盖。
在这里要思考一个问题,既然我们上传了头像,就要在页面上进行展示,头像展示需要获取地址,那么如何获取图片保存后的地址?
在之前设置路由的时候,我们设置过一次静态文件目录,头像图片也属于静态文件,所以我们要对我们的上传目录再进行设置。
initRouter.go
router.StaticFS("/avatar", http.Dir(utils.RootPath()+"avatar/"))我们将我们上传的路径,映射为 /avatar 之后,我们就可以通过改路径进行访问资源。
完善我们最后的代码
avatarUrl := "http://localhost:8080/avatar/" + fileName
user.Avatar = sql.NullString{String: avatarUrl}
e = user.Update(user.Id)
if e != nil {
    context.HTML(http.StatusOK, "error.tmpl", gin.H{
        "error": e,
    })
    log.Panicln("数据无法更新", e.Error())
}
context.Redirect(http.StatusMovedPermanently, "/user/profile?id="+strconv.Itoa(user.Id))
当图片进行报错后我们再次重定向到 /user/profile 路由,这也页面上就会显示我们新的数据。
✍总结
通过本章节的学习 再次使用到了数据库的一些操作,同时也对文件上传进行了学习,并且完善了页面对于静态文件的显示。
👩💻本章节代码
相关内容


如果你觉得这篇文章对你有所帮助,欢迎赞赏~
赞赏